
Materials needed:
- Mylar gift wrap sheet or a cellophane sheet
- Clothes pin
- Tape
Procedure:
|
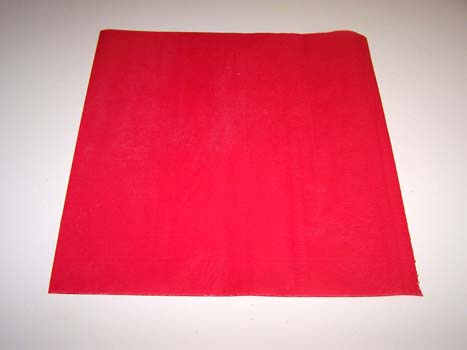
1. Cut a 12x12 square from a Mylar gift wrap sheet, cellophane sheet, or a plastic zippered freezer bag. Note: Cut a smaller square for a smaller size cone or a bigger square for a bigger size cone. |
 |
|
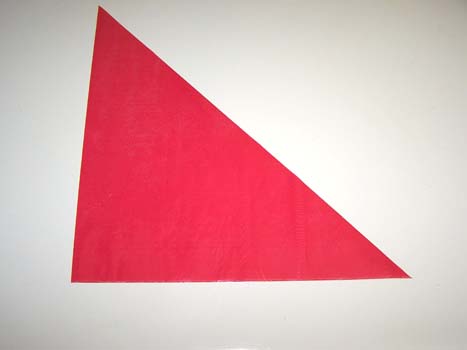
2. Cut the square from corner A to corner B, forming 2 rectangles. |
 |
|
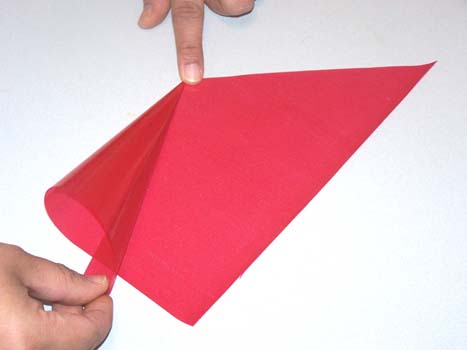
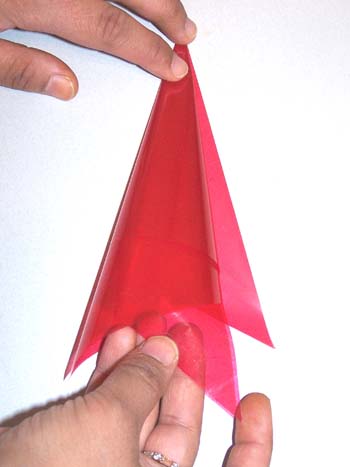
3. If you are right handed, point the right angle towards your right side and place your left finger in the center of the long side. With your right hand, grasp the corner closest to you and pull it towards your right, keeping your left finger in the center of the long side. |
 |
|
4. Start rolling the triangle into a cone shape forming a tip at the placement of the left finger. |
 |
|
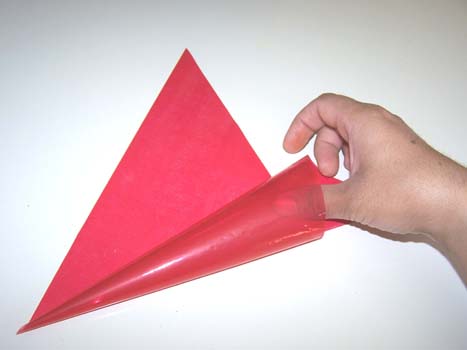
5. Adjust the cone by pulling the outside layer to make it the desired width and the tip the desired opening size. |
 |
|
6. Place a clothes pin inside the tip of the cone. (This prevents henna from drying out once it is in the cone and also adjusts the opening of the cone to a perfect size.) |
|
|
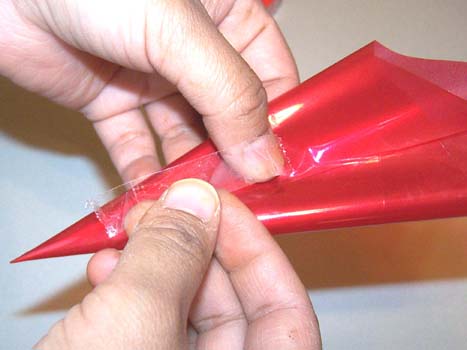
7. Tape all exposed seams from the outside and around the tip to strengthen it. |
 |
|
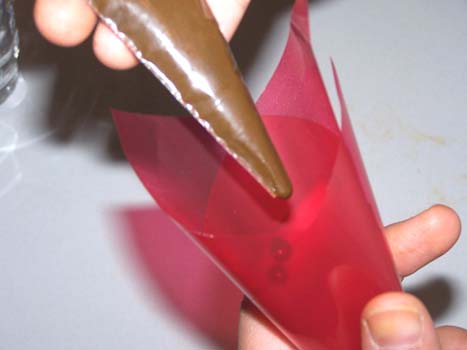
8. Fill the cone half-way or slightly less with a well strained henna paste (free of large particles) using a carrot bag with a large opening or carefully with a small spoon making sure not to get it on the opening edges. |
 |
|
9. Place the cone on a flat surface and push the henna down from the back towards the tip without letting it come out of the tip. |
|
|
10. Fold in the sides of the cone towards each other, roll down the top, and tape it down to prevent henna from leaking out the back. |
  |
|
Take out the pin from the tip of the cone and squeeze out some henna to check for continuity. If the opening is too small, place the pin back into the opening half way and roll it around to make the opening larger. For an even larger opening, snip the tip of the cone to achieve the desired width. Be sure to place the pin back in after every use to prevent the henna from drying and the tip from clogging. |
 |
|
Now you are ready to design! |
Note: If your lines are not coming out smoothly or if you have to squeeze pretty hard, then your paste is too thick or your hole is too small. In these cones a slightly thinner paste (than the one used in carrot bags) works best.
